

 Login / Signup

How to Repair Breathable Waders: A Step-by-Step Guide
Breathable waders are like a car, if you service them, and repair the odd issue, you'll get lots of K's out of them. Breathable waders are basically designed to be repaired, so it's usually an easy job.
Over time, even the best waders can develop leaks, punctures, or seam issues. Learning how to repair your waders can save you money and extend their lifespan. Here's a comprehensive guide to repairing breathable waders.
Common Issues with Breathable Waders
- Punctures: Small holes from sharp objects like hooks or thorns.
- Seam Leaks: Worn or broken seals along seams.
- Tears: Larger rips in the fabric, often requiring more substantial repairs.
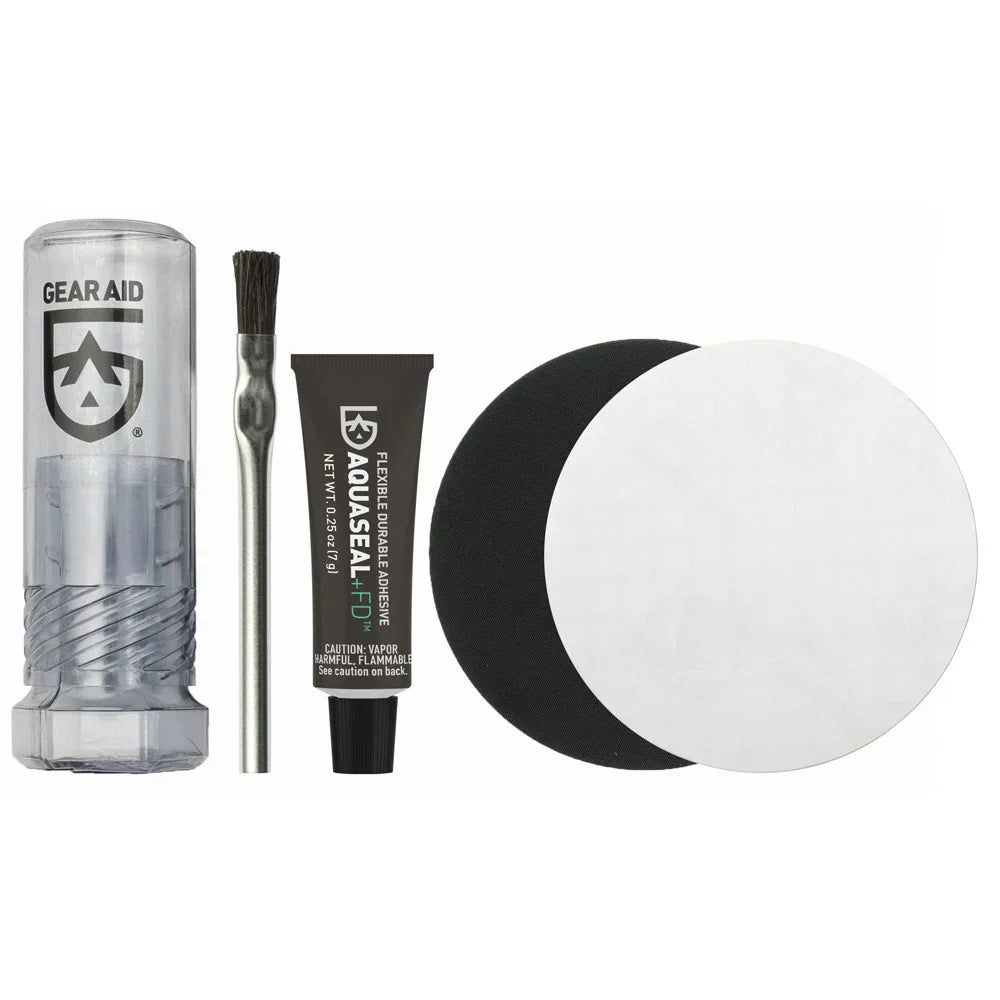
Materials You’ll Need
To repair breathable waders effectively, gather the following supplies:
- Patch Kit: Often includes glue and patches. This is your best option.
- Aquaseal: A waterproof and flexible adhesive.
- Alcohol Wipes or Isopropyl Alcohol: For cleaning and preparing the surface.
- Hairdryer: To speed up drying.
- Basin of Water or Spray Bottle: For detecting leaks.
Step-by-Step Repair Process
1. Identify the Leak
- Submersion Test: Turn the wader inside out and fill the waders with water and watch for drips. Mark the spots with chalk or a marker.
- Dry Detection: Turn the waders inside out, spray water on the suspected area, and look for damp spots. With some materials like Gore-Tex, use methylated spirits in a spray pack and spray it on the inside of the wader. Where there is a hole it will show up as a dark spot.
2. Clean and Prepare the Area
- Thoroughly clean the area around the leak using alcohol wipes or isopropyl alcohol.
- Ensure the surface is dry and free of dirt or oil.
3. Repair Punctures
- Apply a thin layer of Aquaseal over the puncture.
- Allow the adhesive to dry for 12-24 hours, or use a hairdryer for faster curing.
- For pinprick holes, applying a small dob of Aquaseal and rubbing it into the material is the easiest way to seal the material membrane.
4. Repair Tears or Larger Holes
- Cut a patch from the Aquaseal kit, ensuring it’s slightly larger than the tear.
- Roughen the edges of the patch and the wader around the tear with sandpaper.
- Apply adhesive to the patch and the wader.
- Press the patch firmly over the tear and smooth out air bubbles.
- Keep pressure on the patch as it cures by using a book or clamp. Let it dry completely before use.
5. Fix Seam Leaks
- Apply adhesive directly to the leaking seam.
- Work the adhesive into the seam with a small brush or your finger.
- Let it cure according to the adhesive instructions.
Tips for Long-Term Maintenance
- Inspect Regularly: Check your waders for damage after every trip.
- Store Properly: Avoid folding waders; hang them in a cool, dry place. Don't roll them up if they're wet.
- Avoid Overexposure: Prolonged sunlight or extreme heat will degrade the material.
- Keep a Repair Kit Handy: A small kit can save your trip if leaks occur in the field. Repair tape ensures a fast repair that get you fishing immediately.
When to Replace Your Waders
If repairs no longer hold or the fabric has become too worn, it may be time to invest in a new pair. However, proper care and timely repairs can keep your waders functional for many seasons.
By following these steps, you can repair your breathable waders quickly and effectively, ensuring they remain a reliable part of your flyfishing adventures. Happy wading!


