


 Login / Signup

When fishing a dun hatch, you can't beat the confidence of being able to clearly see your dry, writes Craig.
My eyesight is not as good as it once was, making it more difficult to see my fly on the water. Even anglers blessed with excellent vision can have difficulty seeing their dry in rough water or difficult light conditions. We’ve all been frustrated fishing into the sun and missing a rise.
There are various means an angler can employ to making a dry fly more visible. One of the most obvious would be to simply fish a larger fly. This can sometimes work, however when trout are selectively feeding, correct fly size can be the difference between success and failure.
Surprisingly, fishing a darker fly can be an option, improving the contrast between the water surface and the fly. However, this is often about angles and backdrop, and the angler can’t always move position to achieve the best surface contrast without compromising the drift of the fly or spooking fish.
Fortunately, there’s another option: fishing a dry fly with a highly visible wing. I am finding myself using hi-vis flies more frequently nowadays. Initially, I was hesitant to embrace their use, believing the highly visible wing would put off the fish. However, I have changed my view. I now believe that wing colour is of little significance to the trout, but is in fact far more important to the angler in allowing them to see the fly.
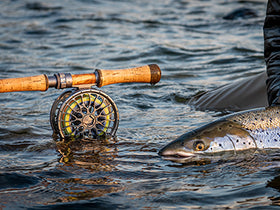
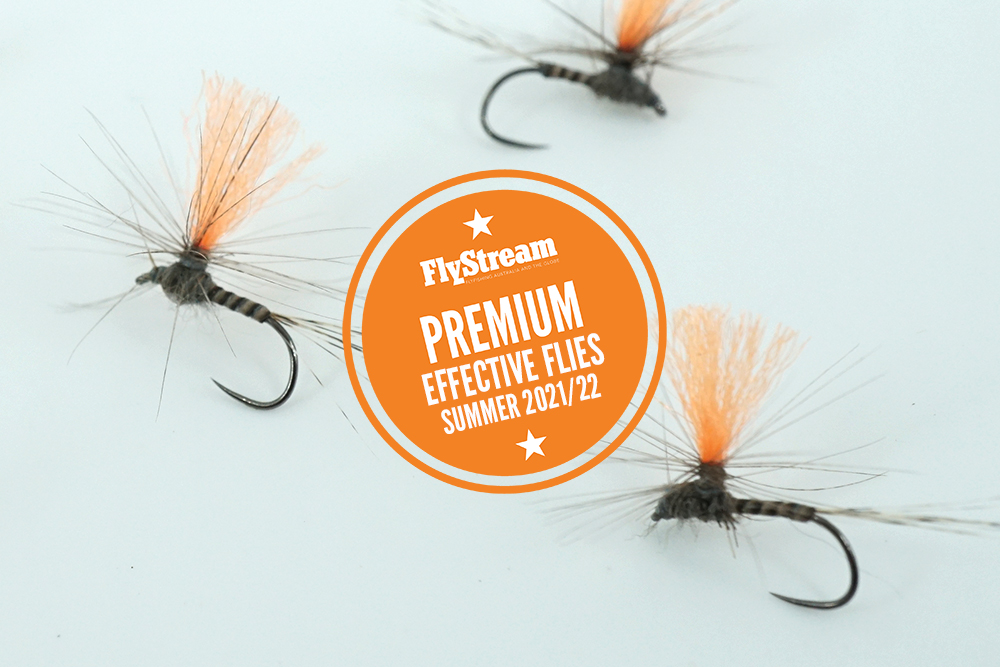
 One to the Hi-viz dun - when a fish like this eats your dry, you want to know!
The main consideration when selecting a wing colour, is choosing a colour you can see, which may vary depending on light conditions. My favourite colours are fluoro orange, pink and coral. Other commonly-used colours are fluoro chartreuse, and white. White can work very well with an otherwise black fly, as it means one or other is likely to provide very good contrast.
There are many synthetic Antron wing materials on the market, most of which are effective, and I personally don’t have a favourite. Simply pick a colour which works well for you.
One of my favourite hi-vis flies is the Hi-vis Dun. I use it regularly when guiding on Tasmania’s highland lakes and at Millbrook Lakes. Believe me, my clients always appreciate a dry fly that’s easier to see!
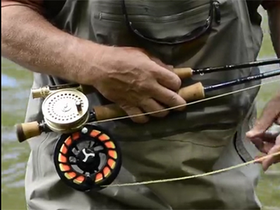
Materials
Hook – Dry fly barbless medium wire, size 12-14.
Thread – Black 8/0
Tail – Coq de Leon
Body – Stripped peacock quill.
Thorax – Muskrat or natural blended possum fur.
Wing – Hi-vis Antron (colour to suit).
Hackle – Dark Dun saddle hackle.
This material selection will create a natural grey dun pattern. If you are looking for a different coloured fly, such as brown or claret which I also use, simply alter the colour of materials to suit.
Tying Instructions
- Tie in approximately 8 hackle fibres for a tail; the same length as the hook. (I like to take a turn of thread between the tail fibres and the hook. This tends to kick up the tail slightly and splays out the fibres. This helps with fly floatability and stability.)
- Prepare the peacock by rubbing off the fibres with a rubber. (I cheat and purchase mine prepared and died from Polish Quills in Poland!)
- Put down a fine base of Superglue on the hook shank.
- You will notice the quill has a natural camber in it. The end of the quill should be caught with a single turn of thread, with the cup facing out.
- Then wrap the hook shank with touching turns. Hackle plyers make this step easier. (For extra durability, paint the body with a fine coating of clear nail polish and allow to dry.)
- Next, three-quarters of the way down the hook shank, tie in a 25mm length of Antron parallel with the hook shank, then fold up and wrap your thread around the two pieces of wing material, in an anti-clockwise direction, creating a post.
- Next, tie in the saddle hackle with the camber curve facing away from you.
- Then dub in a small thorax either side of the wing post.
- Wind the hackle approximately 5 turns anti-clockwise around the wing post. Each turn should be under the last.
- Next, secure the hackle with three anti-clockwise turns of waxed thread between the hackle and the thorax of the fly.
- Finish off behind the eye of the hook with a whip finish. (These last few steps are difficult to describe, and I would suggest viewing the FlyStream video.)
- Finally, cut the wing to length, approximately three-quarters the length of the hook shank. Don’t make the wing too short, as a longer wing acts as a keel on the fly as it alights on the water, helping the fly to land and float correctly.
A couple of tips: if my parachute fly does not sit up correctly, i.e. lies on its side, I recast the fly at the first opportunity.
Also, a general tip is that most parachute-style flies are best tied as described above. It’s very important for the hackle and the thread to be tied in the same direction, as it tightens the hackle on the wing post.


